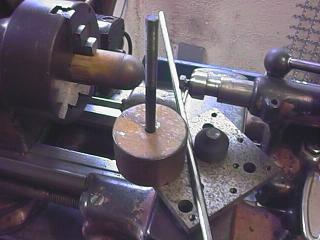
Metal spinning is a technique where a flat metal disk is pressed against a form while turning in a lathe. It is a convenient method for the making of balls and other round elements for use in high-voltage instruments. Below I describe how I use this technique to make terminal balls for electrostatic machines.


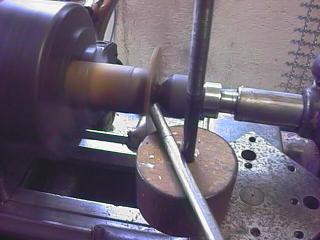
I use my old South Bend lathe, where I adapted a tool rest made of a vertical steel bar fixed by two nuts in a general-purpose support that adapts to the carriage of the lathe, with a wood cylinder that can rotate around it. I made also a live center for the tailstock, and a spinning tool, that is a long steel bar with one end cut to a wedge shape, with well rounded borders and polished to a mirror finish, and a wood handle. The wood cylinder serves as rest for the tool, and can rotate with it when under pressure. The vertical bar serves as fulcrum for the lever movements of the tool. I found this disposition very convenient.
The form, or chuck, is cut in hard wood, with a ball turning tool for precise finishing, and has the shape of a little more than half ball. It is held by the 3-jaws chuck of the lathe, well centered. Note that this is rather dangerous because the tool can escape and hits the jaws. Better would be to fix it to a face plate. The form can be used many times, to produce identical pieces.
A metal disk, in this case 0.4 mm copper, is cut with metal scissors, annealed by heating to a dark red color and fast cooling by immersion in water, and mounted between the form and the live center in the tailstock. A wood block with a concave form approximately matching the curvature of the form is used to press the disk against the form.
Some paraffin (a candle) is rubbed against the disk and the tip of the tool, and the spinning process is started. I set the lathe speed to a medium value, and gently start to press the disk against the form using the steel bar.
The center is pressed initially, while keeping the outer border of the disk flat. This firmly presses the metal against the form, and allows safe pressing of the outer areas of the disk into a bell shape. The procedure is to produce a shallow depression with the tool tip and to move it by slowly moving the tool tip from the center to the edge of the disk. Some reverse movements can also be made, to avoid excessive stretching of the metal.
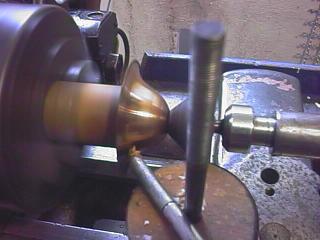
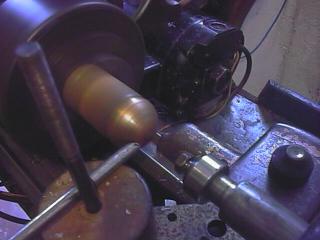
Care must be taken to avoid the formation of ripples, that can cause the tearing of the metal. If they form, due to excessive pressure applied, the disk must be removed from the lathe, possibly annealed, and the ripples must be hammered out between wood blocks.
When the half-ball is almost complete, it is necessary to cut out the excess of material, with metal scissors (I found that to try to use a cutting tool in the lathe for this is an invitation to disaster), and anneal the metal again. The next operation is to press completely the disk against the form, compressing the outer border. At this point is not uncommon a rupture of the metal, so great care must be taken. As the form curvature goes a bit after 180 degrees, the metal gets firmly fixed to the form (if it isn't, anneal and press it again). The tailstock can then be moved away and the half-ball polished using the flat surface of the tool, smoothing any surface irregularity, including the area that was covered by the tailstock pressure block. I do this running the lathe at high speed and with good lubrication (paraffin), if necessary checking by touch if there is any irregularity in the metal surface.
The final operation is to force the half-ball out of the form (simple, with a lever using the vertical bar and a screwdriver) and trim it to the exact height, by sanding the border with a sandpaper foil over a flat surface, with frequent measurements of the height, that shall be of exactly half diameter.
With some care, the result is a half-ball that will require very little further polishing. Two halves are made and glued with epoxi glue applied to the interior of the borders. The outer side is kept clean of glue, as it is difficult to remove it later. At a hole at the center of one side, a screw is glued with the thread outside for fixation. Brass or copper balls can also have the two halves soldered together. I apply a small amount of solder to the internal edges of the halves, mount the ball in the lathe lightly pressed between wood blocks, and apply a large soldering iron to the joint, while rotating the ball slowly. When some molten solder start to leak, the soldering is done. It's better to let the smallest possible amount of solder to leak, as it's difficult to remove it from the outer surface. A fixation screw can be soldered too, before the operation. In any case, if the halves get misaligned, heat from an alcohol lamp opens the union, that can be then tried again. Don't try to correct large misalignments by grinding.
Below, two half-balls made as shown, and some other half-balls of several sizes and materials (aluminum, copper, and brass), as they were obtained from the same spinning proccess. Note that brass is harder, and requires more annealings. The final polishing will be done only after the halves are joined.
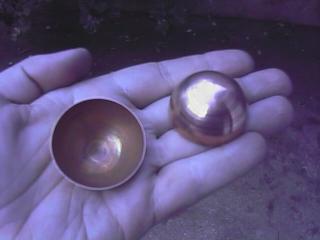
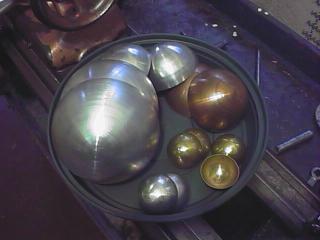
The process is not fast, and rather difficult to master, but making solid balls is not easy or fast too. These hollow balls are much lighter, and use much less material. Similar procedures can be used to make round cylinder ends, disks with rounded borders, and even toroids.
See my links about electrostatic machines, metalworking, and other subjects
Created: 1999.
Last update: 10 August 2003
Developed and maintained by Antonio Carlos M. de Queiroz.